In this blog post, I am going to show you how you can set up facebook pixel tracking on your website using Google Tag Manager.
By the end of this post, you’ll be able to set up Facebook base pixel and event tracking on your website. You’ll know how this tracking is necessary to create custom conversions and retargeting audiences on facebook.
So let’s discuss the steps here in brief
Steps for setting up Fb pixel tracking using GTM
Ok, so let’s assume that you have already created GTM and Facebook Ads accounts and they are working properly. Now the next steps are as follows:
1. Get the pixel code from your Facebook Ads account
Once you are logged into your Facebook ads manager account, go to Pixels tab under Events Manager and click on “Create a Pixel” button. Then you’ll be prompted with three options. Choose “Manually Install the pixel code yourself” option.
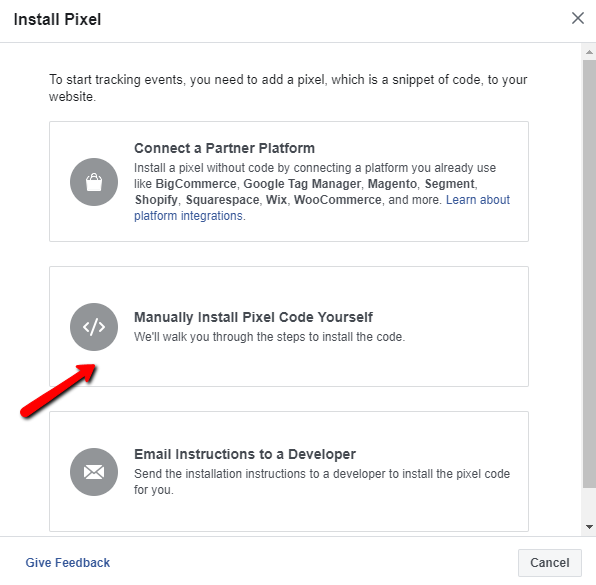
There is a GTM plugin available too with “Connect a Partner Platform” option, but I will recommend using manual installation of pixel code method only.
This plugin would upload a black box template on your GTM account and is not really useful as GTM allows a lot of flexibility through manual installation. Further, this can be a huge risk for big companies which have a lot of important data and resources, the security of which should not be compromised at any cost. Therefore manual installation is recommended for security purposes.
When you choose manual installation, earlier you’ll get a little bit of instructions to place your code as following:
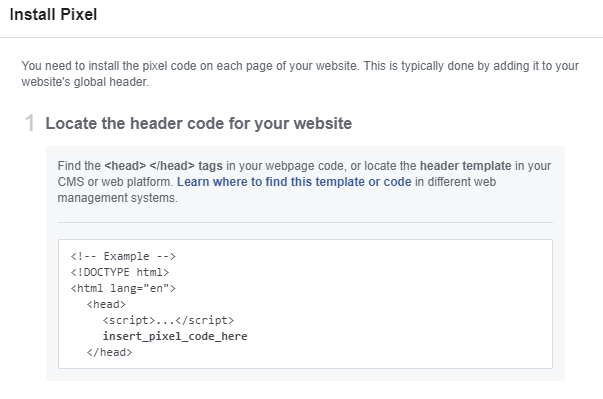
But as we are going to use GTM to install our pixel, it will take care that our pixel gets fired on the page as soon as the page loads. So you don’t really have to care about the code placement here.
Just copy your Facebook pixel code and save it somewhere. We call it Facebook base pixel as it’s necessary to be implemented on every page of your website and for other fb event codes to work.
2. Create Custom HTML tag in GTM for Fb base pixel
Select tags option on the left side in GTM account and then click on “New” button to create a new tag. In the tag configuration option select the tag type as Custom HTML.
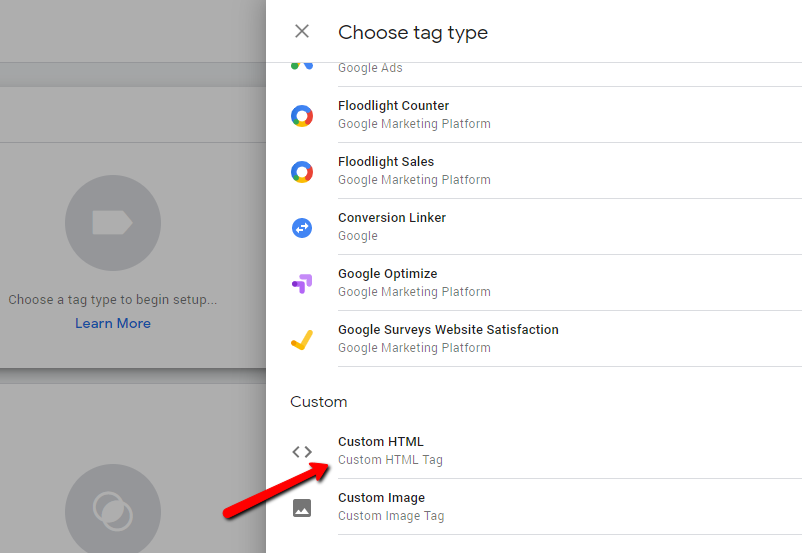
Now from the fb base pixel, just add your script tag in the html box. Don’t add noscript tag here.
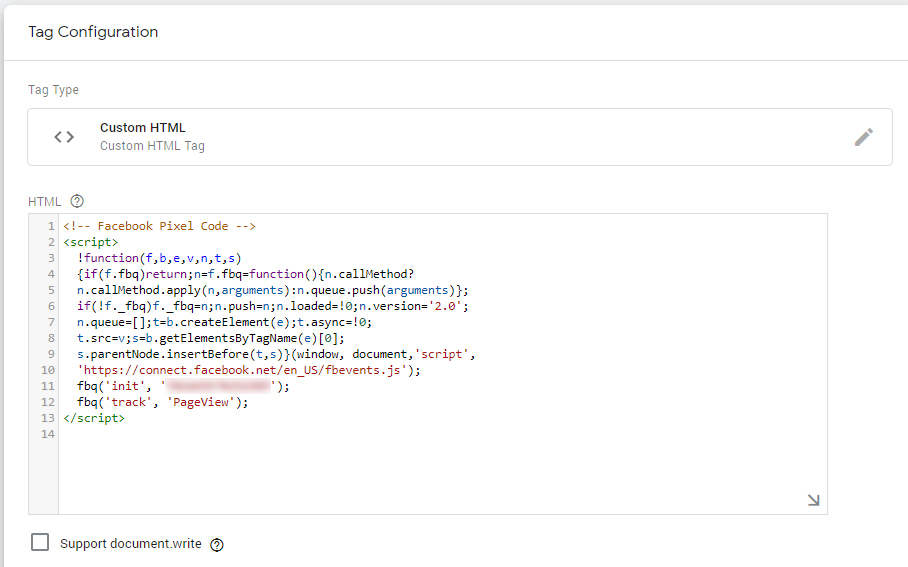
In the triggering option select “All Pages” and save your tag. You can name it as Fb – Base Pixel Tag.
Now, the noscript tag can be left off as it’s not so important because it is for web browsers which have javascript disabled. Browsers with javascript disabled are very few these days i.e about 1% or less.
But if you still want to add this tag for 100% accurate tracking then create a new custom image tag for it. Just grab the image URL form noscript portion of your code and add it in image URL settings in the tag. Leave all the settings as default and fire on all pages.
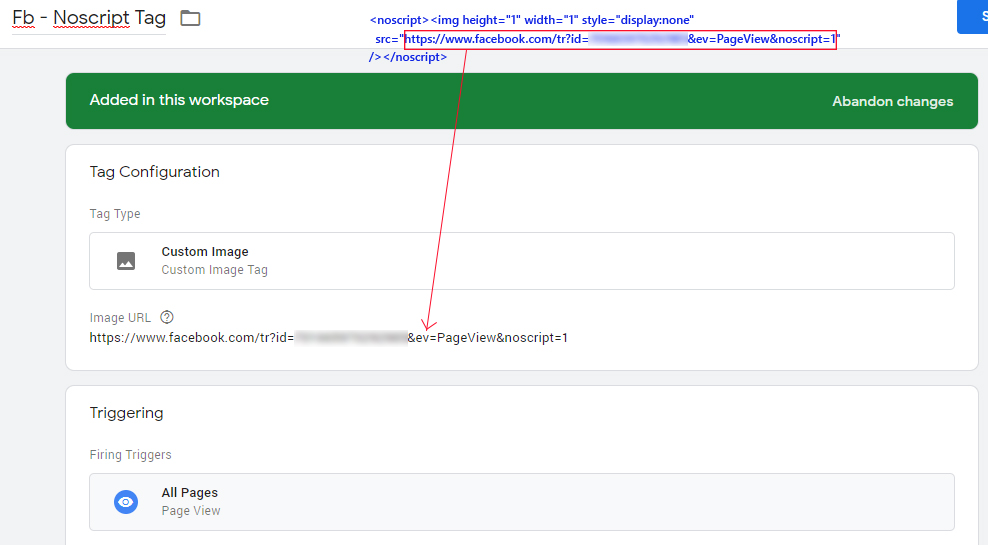
In fact, we can do other settings to only fire it on javascript disabled browsers, but for the sake of making this post easy for you to understand, I am suggesting firing on all browsers here. It will still work fine. Means, noscript tag will fire on javascript enabled browsers + javascript disabled browsers whereas it is not required to fire on javascript enabled browsers as we have our custom html tag for that.
3. Create Custom HTML tag for Fb event tracking code
In the above step, we have set up our Fb base pixel code to fire on all pages of the website and track page views. This installation is enough if you only want to track page views and run retargeting ads.
But if you want to track other events for conversion tracking, then click on “Set Up Events” option in the pixel installation screen.
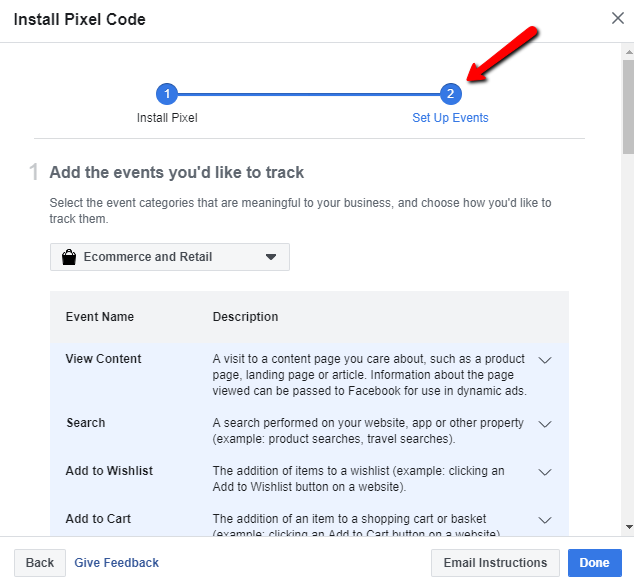
To track certain events on Facebook we can get event codes from here. For e.g to track lead event we have this code:
<script>
  fbq('track', 'Lead');
</script>
Let’s set up this event code as an example to show you. Create a new custom HTML tag in GTM as you did before for fb base pixel code and add the event code in html box.
But here you’ll have to do one extra setting. In the Tag Sequencing option choose to fire fb base pixel code before your event tag.
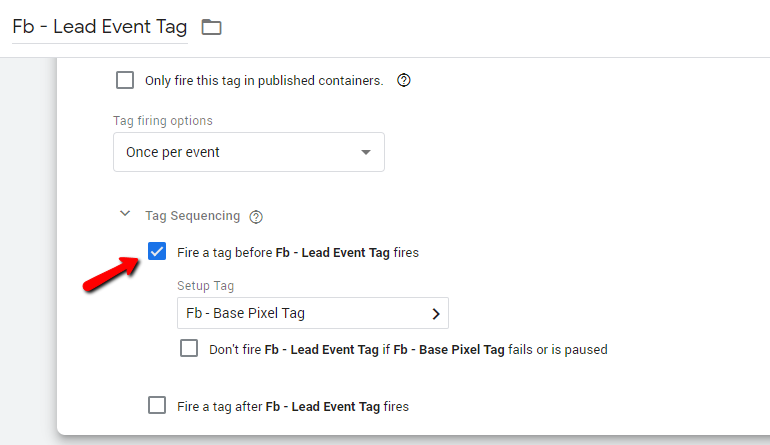
We are doing this because Fb base pixel code needs to fire before any other event code as it loads library first which is necessary for fb pixel to work properly.
After that in the triggering option create a new page view trigger and put the path of the URL where you want to fire this event code. Let’s assume that your thank you page which comes after the form submission on your website is like www.YourDomain.com/thank-you.html. So put the page path i.e “thank-you.html” in triggering settings.
Conclusion: This post was to explain you, how you can set up Facebook pixel code tracking through Google tag manager. You get to know how to setup Fb base pixel and then fire certain fb event tags to track specific events through GTM.

